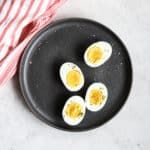
Ninja Foodi Hard-boiled Eggs
Hard-boiled eggs in a Ninja Foodi are easy to peel every time, and they're done in half the time as stovetop boiled eggs. Make a batch for the week ahead!
- Prep Time: 2 minutes
- Cook Time: 6 minutes
- Total Time: 13 minutes
- Yield: 8 eggs 1x
- Category: Breakfast, Lunch, Snack
- Method: Pressure Cooker
- Cuisine: Any
Ingredients
Units
Scale
- 8 eggs
- 1 cup water + more to fit in a large bowl
- 8-10 ice cubes
Instructions
- Add eggs & water. Add the eggs and 1 cup of water to your Ninja Foodi pressure cooker, setting eggs on the wire rack insert (if using). Secure the pressure cooker lid (or transition to the pressure cooker lid using your smart lid, in the new versions of the Ninja), and set the air release valve to "seal".
- Prepare ice water. Fill a large bowl about 2/3 full with water, and add ice cubes. Set aside until eggs are done cooking (this will be used to quickly cool them and stop the cooking).
- Pressure cook eggs. Put the cook setting in "Pressure" mode, set the temperature to High, and set the time to 4 minutes, then press the Start/Stop button to start cooking. The pressure will build for a minute or so, and then the eggs will pressure cook for four minutes. Once that's done, all the pressure to naturally/slowly release for two minutes, then open the air release valve to quick release. Immediately remove the lid.
- Cool the eggs. Use a slotted spoon to carefully transfer the eggs to your prepared ice water bowl, and allow them to cool for five minutes. Then, remove the eggs, dry them off, and enjoy!
Notes
- Storage: Store your hard-boiled eggs in the fridge in a container (or in their original carton) for up to a week. I don't recommend freezing, and the FDA-recommended max for room temperature storage is no more than two hours.
Nutrition
- Serving Size: 1 egg
- Calories: 72
- Sugar: 0.2 g
- Sodium: 71 mg
- Fat: 4.8 g
- Saturated Fat: 1.6 g
- Carbohydrates: 0.4 g
- Protein: 6.3 g
- Cholesterol: 186 mg
Find it online: https://www.rootsandradishes.com/ninja-foodi-hard-boiled-eggs/

