This flaky all butter chickpea flour pie crust is perfect for any savory recipes requiring pie crust or pastry (think galettes with veggies and cheese, quiche, chicken pot pie, savory tarts!). It has tons of awesome flavor plus extra protein and fiber from the chickpeas, and it's gluten-free.

What if I told you... gluten free pie crusts don't have to be sad? And what if I told you that a super flaky, buttery, *gluten free* chickpea flour pie crust is delicious, easy to make, and basically health food? Friends, let's dive right into this buttery business.
While I love all pie crusts, chickpea flour is a new and fun way to get more protein and fiber in your pie crust, plus a unique savory flavor. I mean, the only ingredient is dried chickpeas ground to a flour consistency... so you are essentially eating beans, which are incredibly good for you! Chickpea flour is freaking brilliant.
Whether you're making a quiche with chickpea flour pie crust or a tomato tart, this chickpea flour crust is lovely in savory recipes (how I use it most often). That said, many readers have used it in sweet pies or tarts as well!
Ingredients
This chickpea flour pie crust dough (also known as chickpea flour pastry or gram flour pastry) is made entirely with chickpea flour! Just a few other standard butter pie crust ingredients (listed below), and you're set.

- Chickpea flour - Chickpea flour (also known as gram flour) is easy to find in the baking aisle of your grocery store, or you can order it online! I've tried a few different kinds, and so far my favorite chickpea flour (affiliate link) is the kind from Bob's Red Mill.
- Natural cane sugar - Just a little bit balances out the pie crust flavor.
- Unsalted butter - Real butter is what makes this pie crust flaky and delicious.
- Ice water - We'll only use the water part, but all ingredients must be especially cold for a successful pie crust.
Please see recipe card for full ingredients & instructions.
Substitutions
This recipe is pretty simple and intended to be as it is, so there are just a couple options for substituting.
- Vegan butter - You can use the same amount of vegan butter in place of regular butter for a similar flavor and texture.
- Nutiva Shortening - Another vegan option, Nutiva shortening (affiliate link) is made from ethically sourced coconut and red palm oils and can work in this pie crust as well. Use the same amount of shortening as you would butter (113 grams / 8 tablespoons / ½ cup).
Instructions

Step 1: Cut butter into ½-inch cubes and place in a bowl in the freezer while you prepare other ingredients.
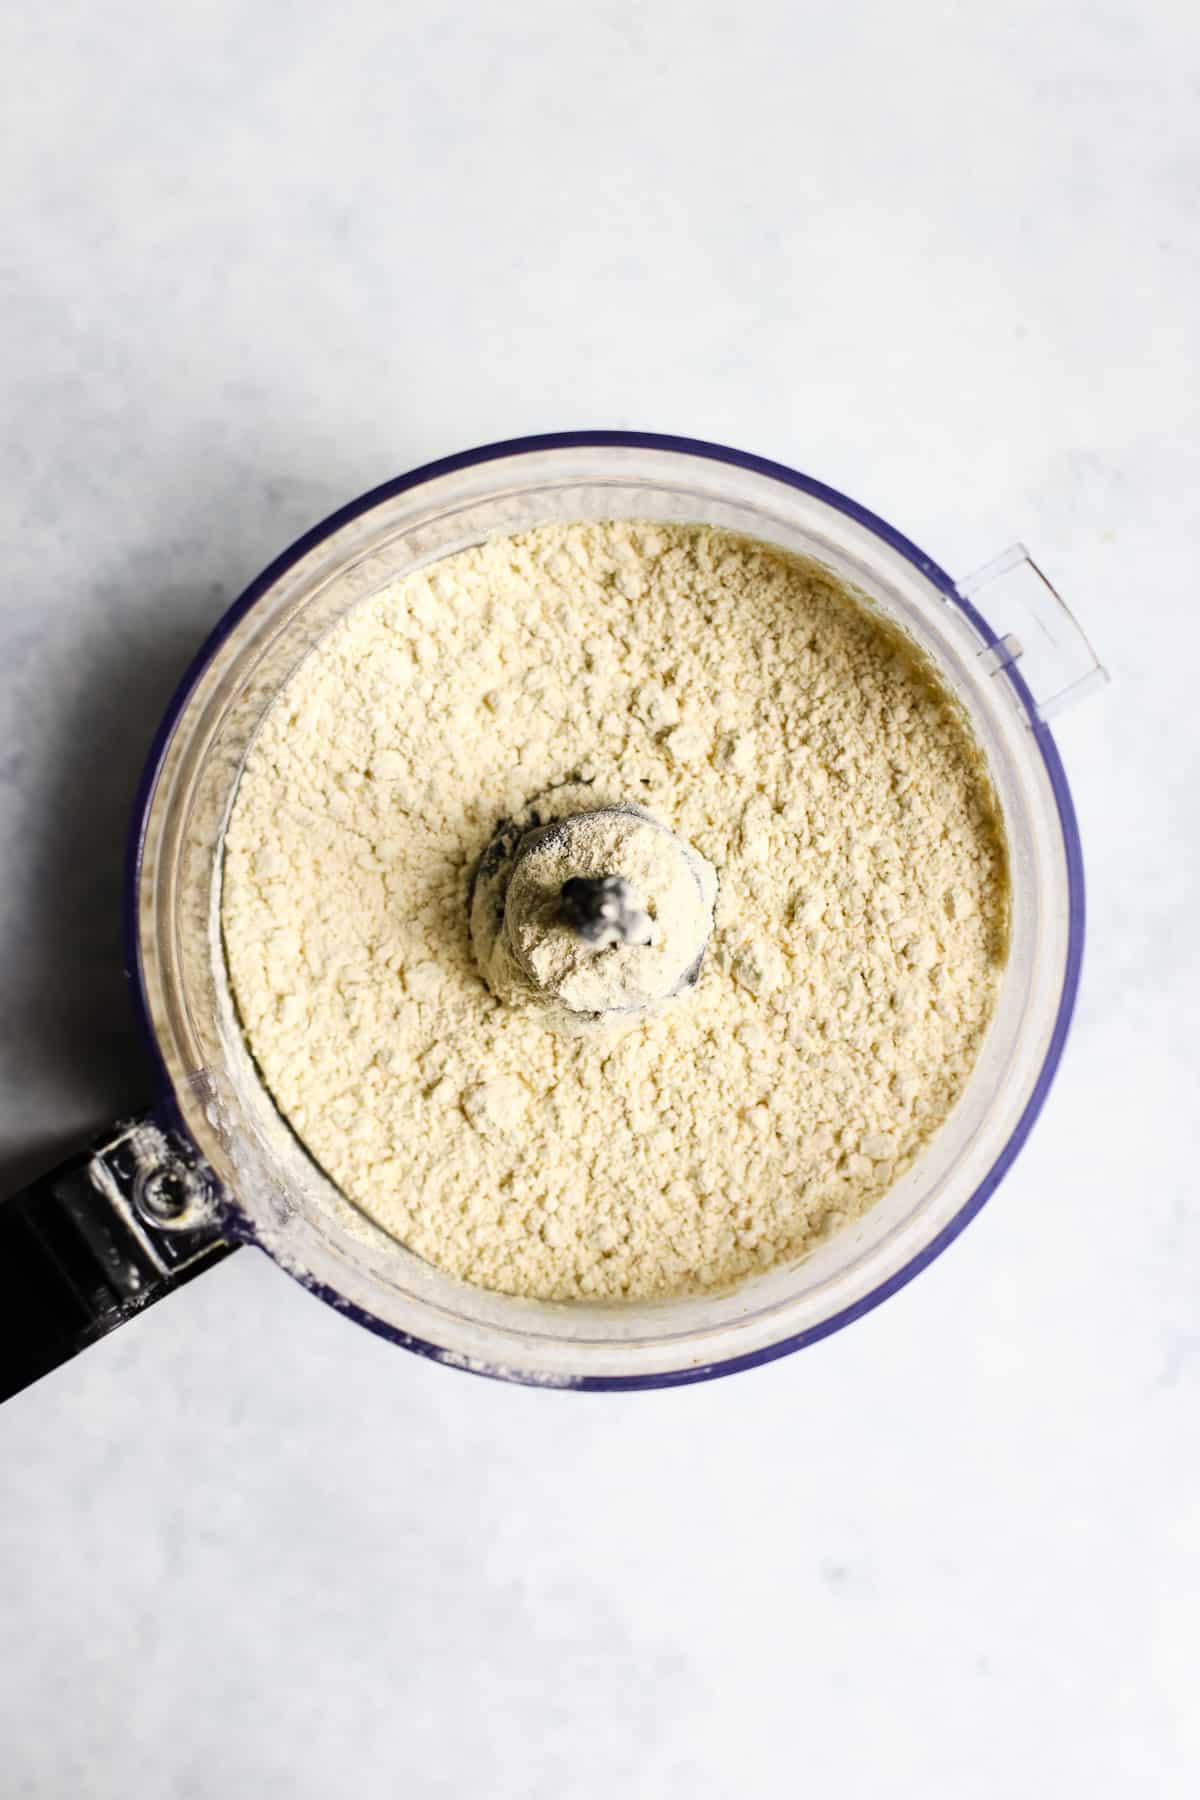
Step 2: In a food processor, combine chickpea flour, salt, and sugar. Pulse once or twice just to combine.
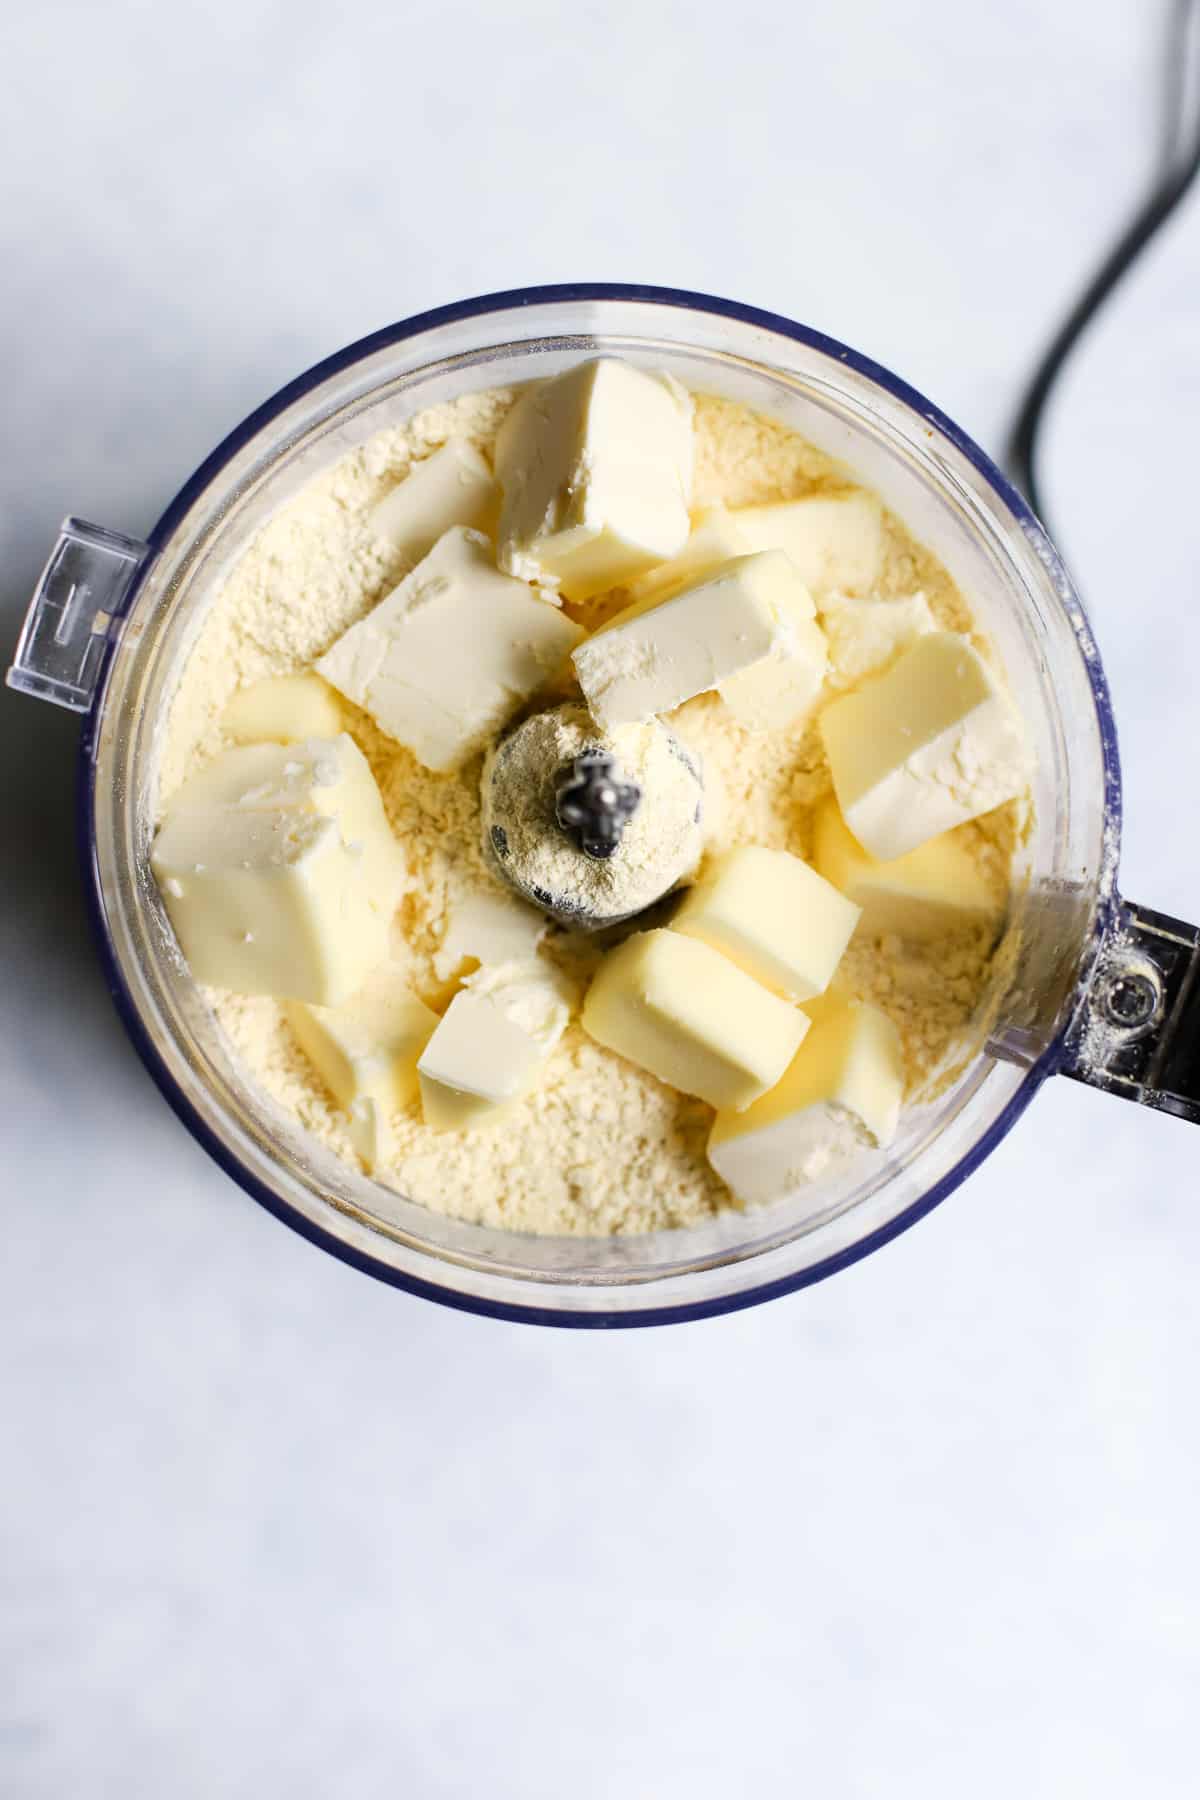
Step 3: Get those frozen butter cubes from the freezer and add them to the food processor with chickpea flour mixture.
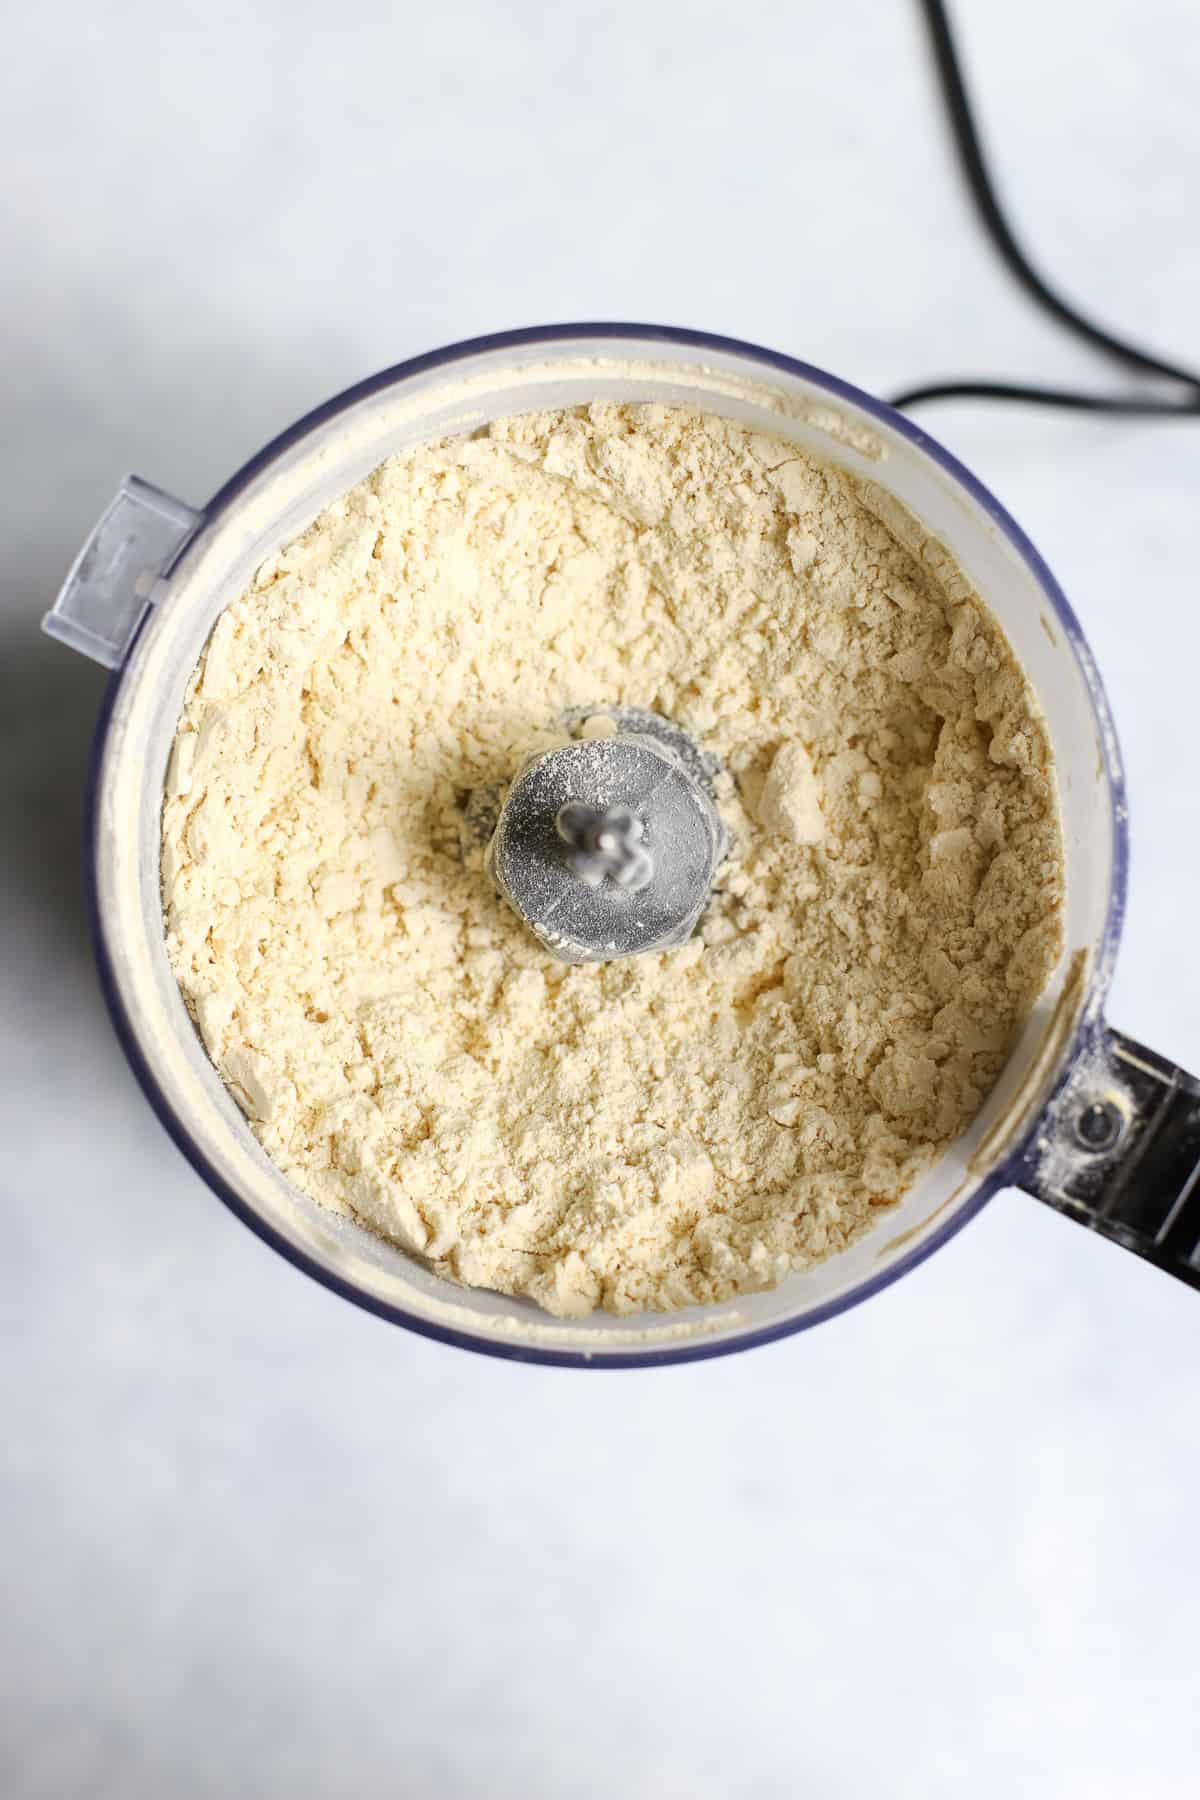
Step 4: Pulse the butter and chickpea flour mixture in the food processor until a crumbly dough forms (pea-sized crumbles).
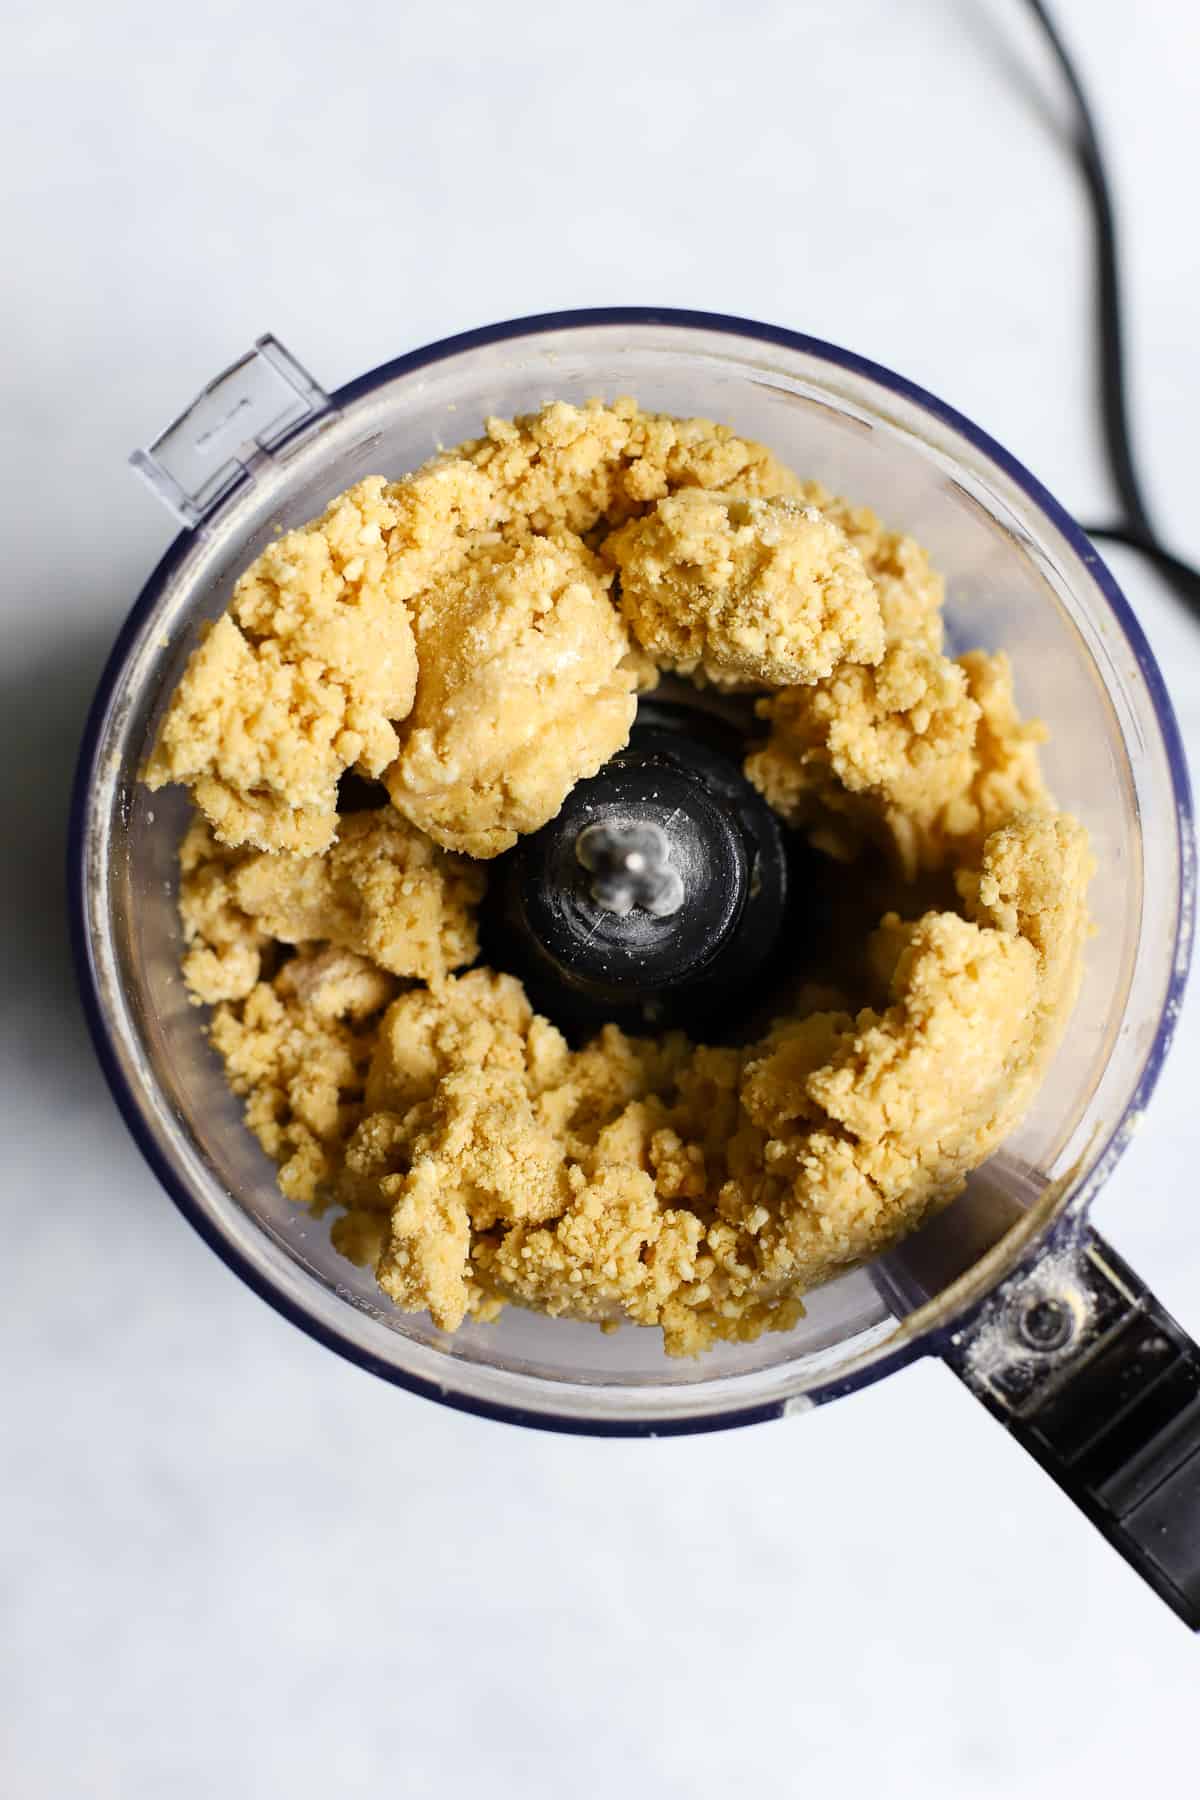
Step 5: Start adding ice water one tablespoon at a time to the crumbly dough, pulsing briefly in between until dough just starts to clump together but remains a somewhat crumbly.
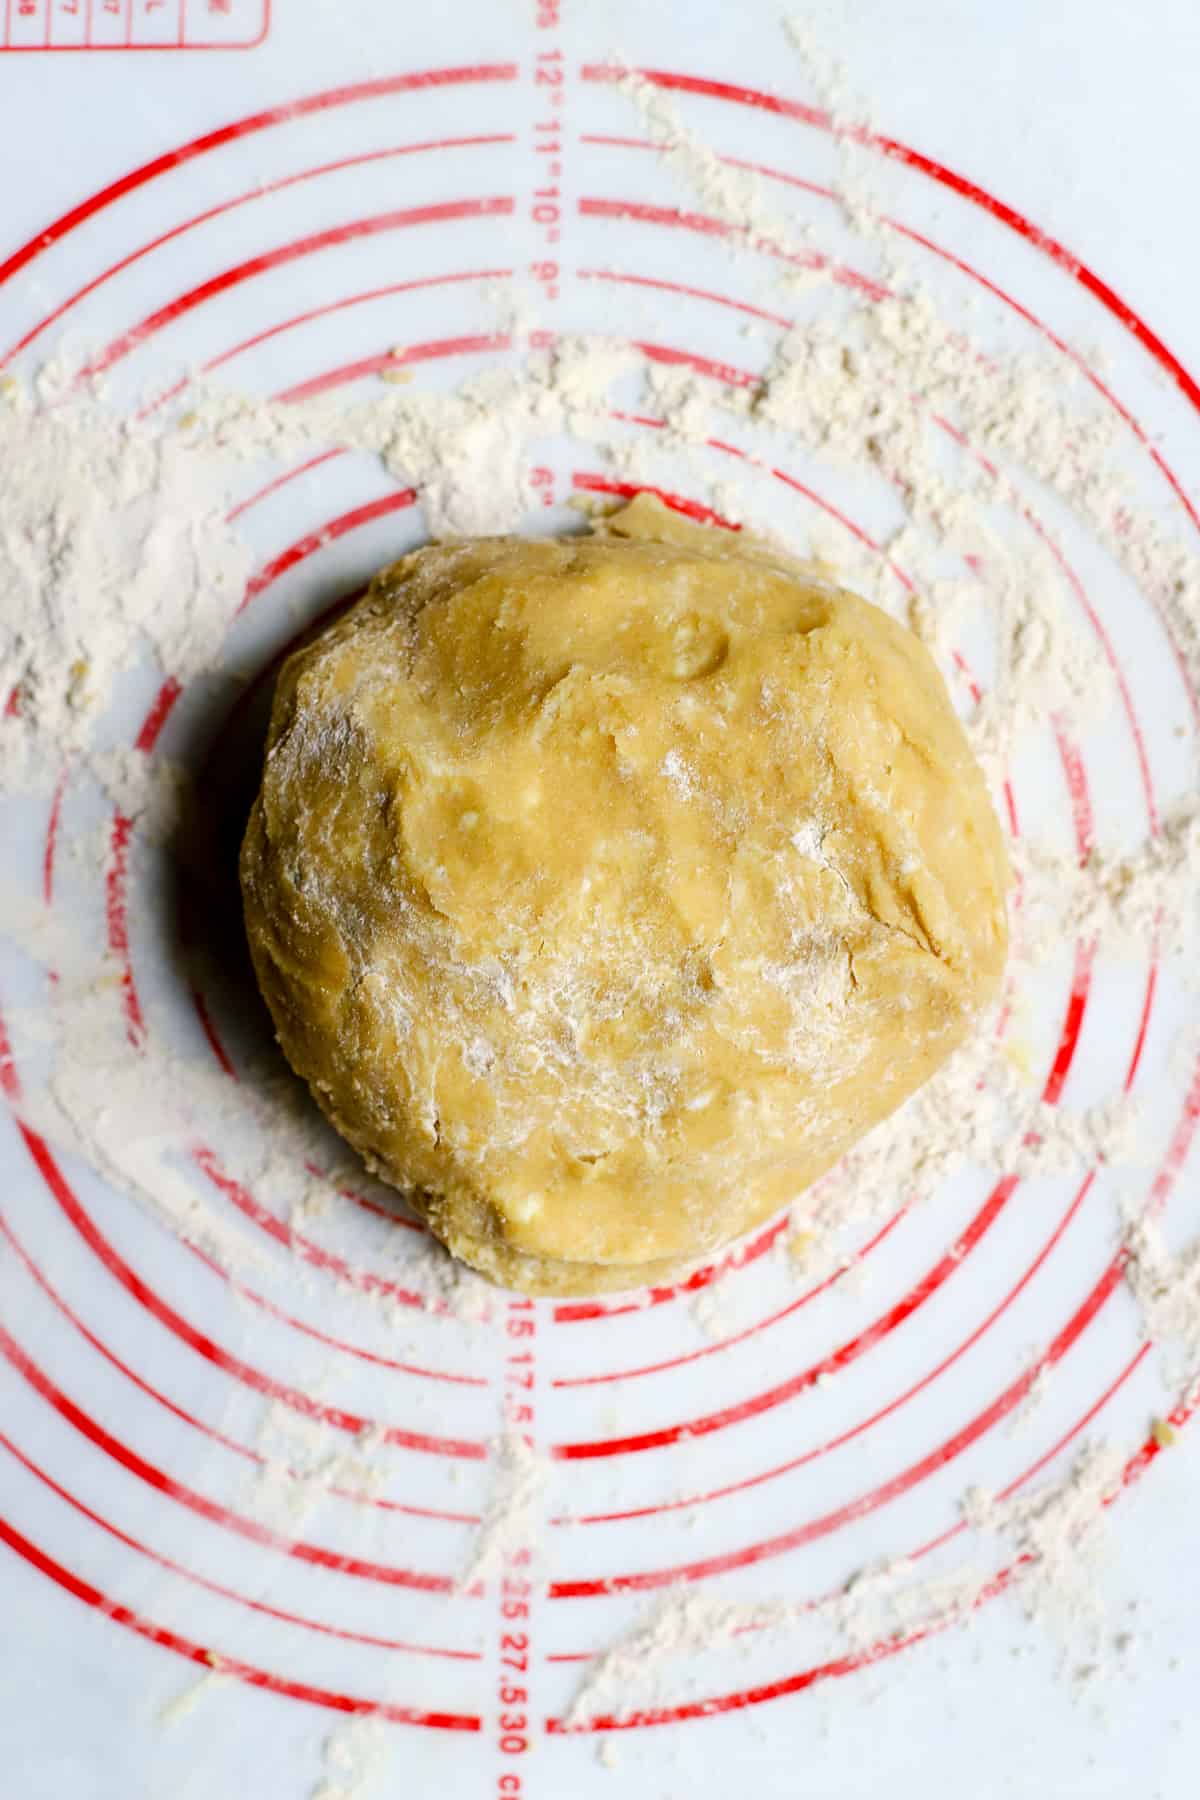
Step 6: Turn the dough out onto a floured surface. I love using a pastry mat for this! Form the dough into a disc shape.
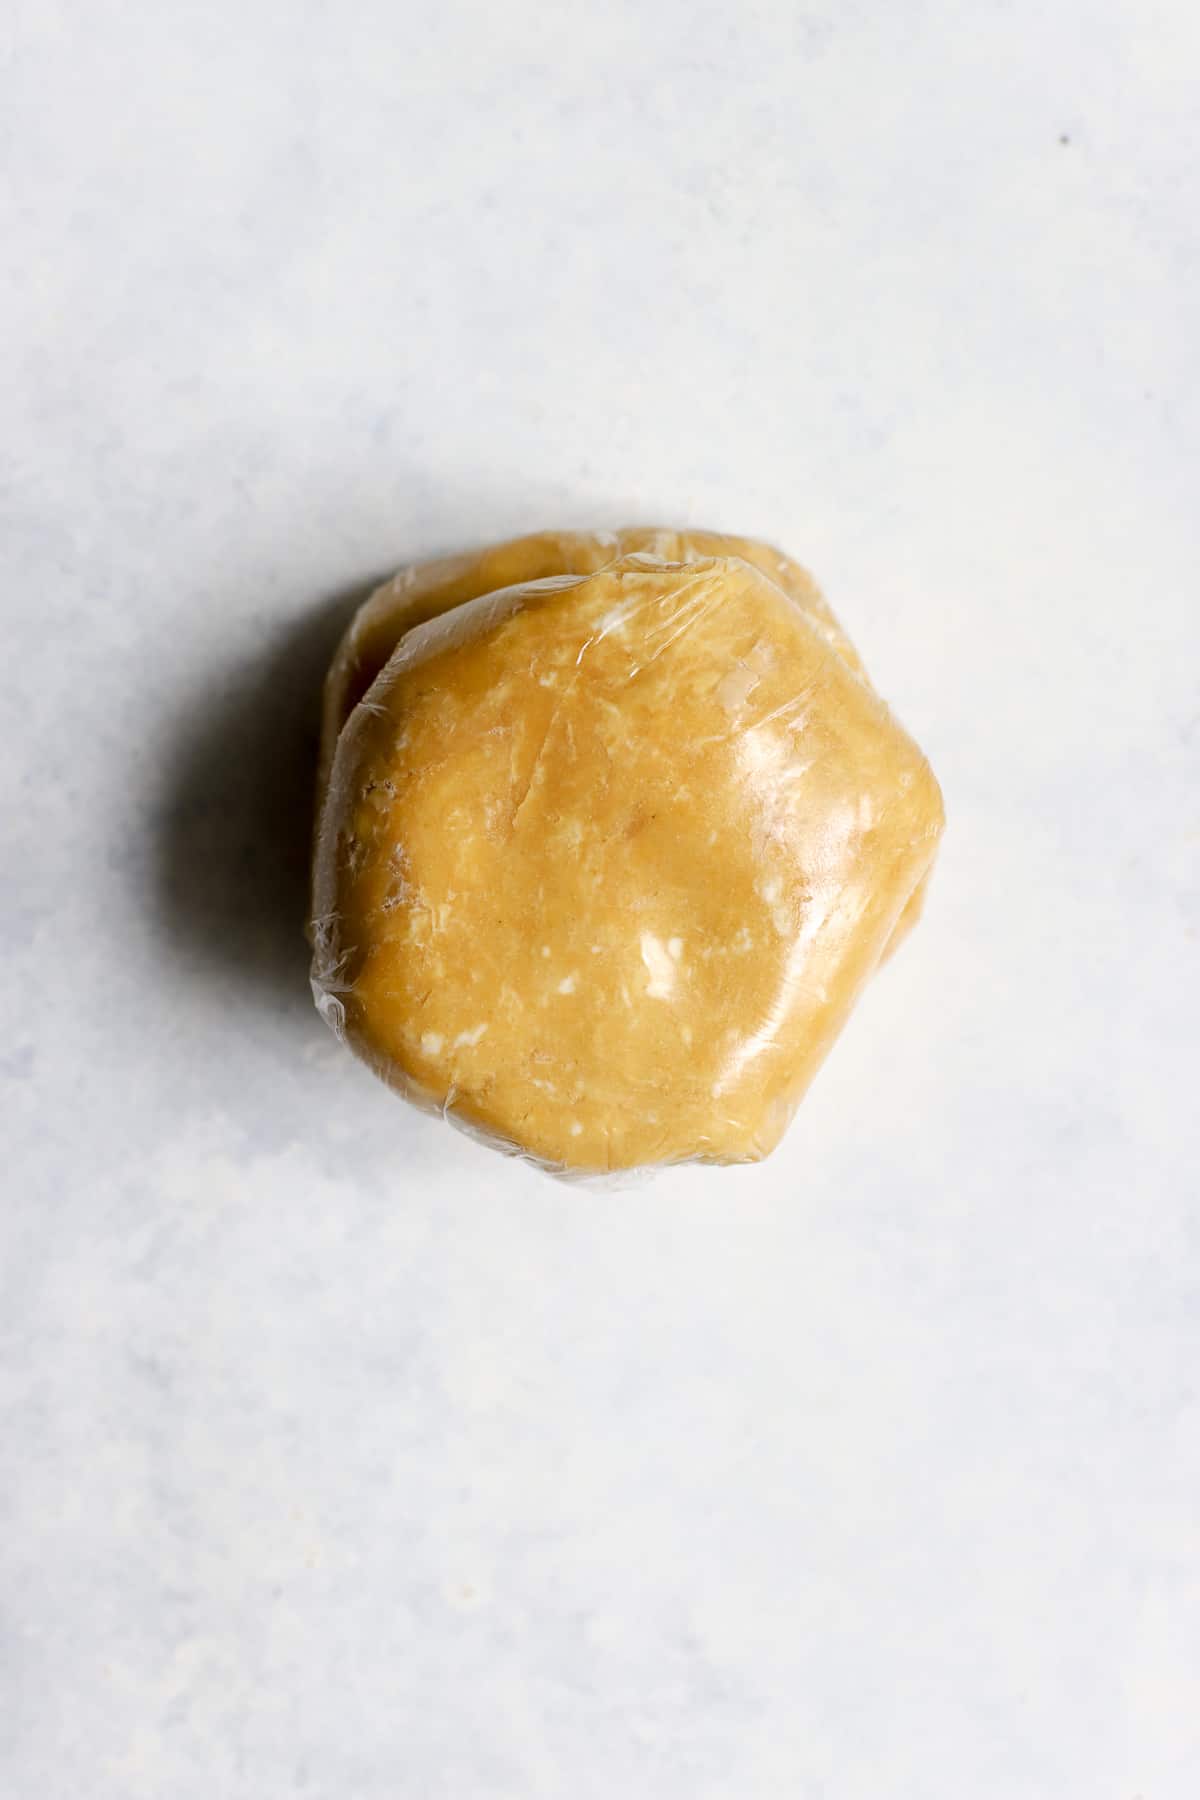
Step 7: Wrap tightly in plastic wrap or a reusable wrap (such as bees wrap) and chill in the fridge for at least a couple hours. Once you're ready to use the pastry, remove it from the fridge and let it sit at room temp for 10-20 minutes.
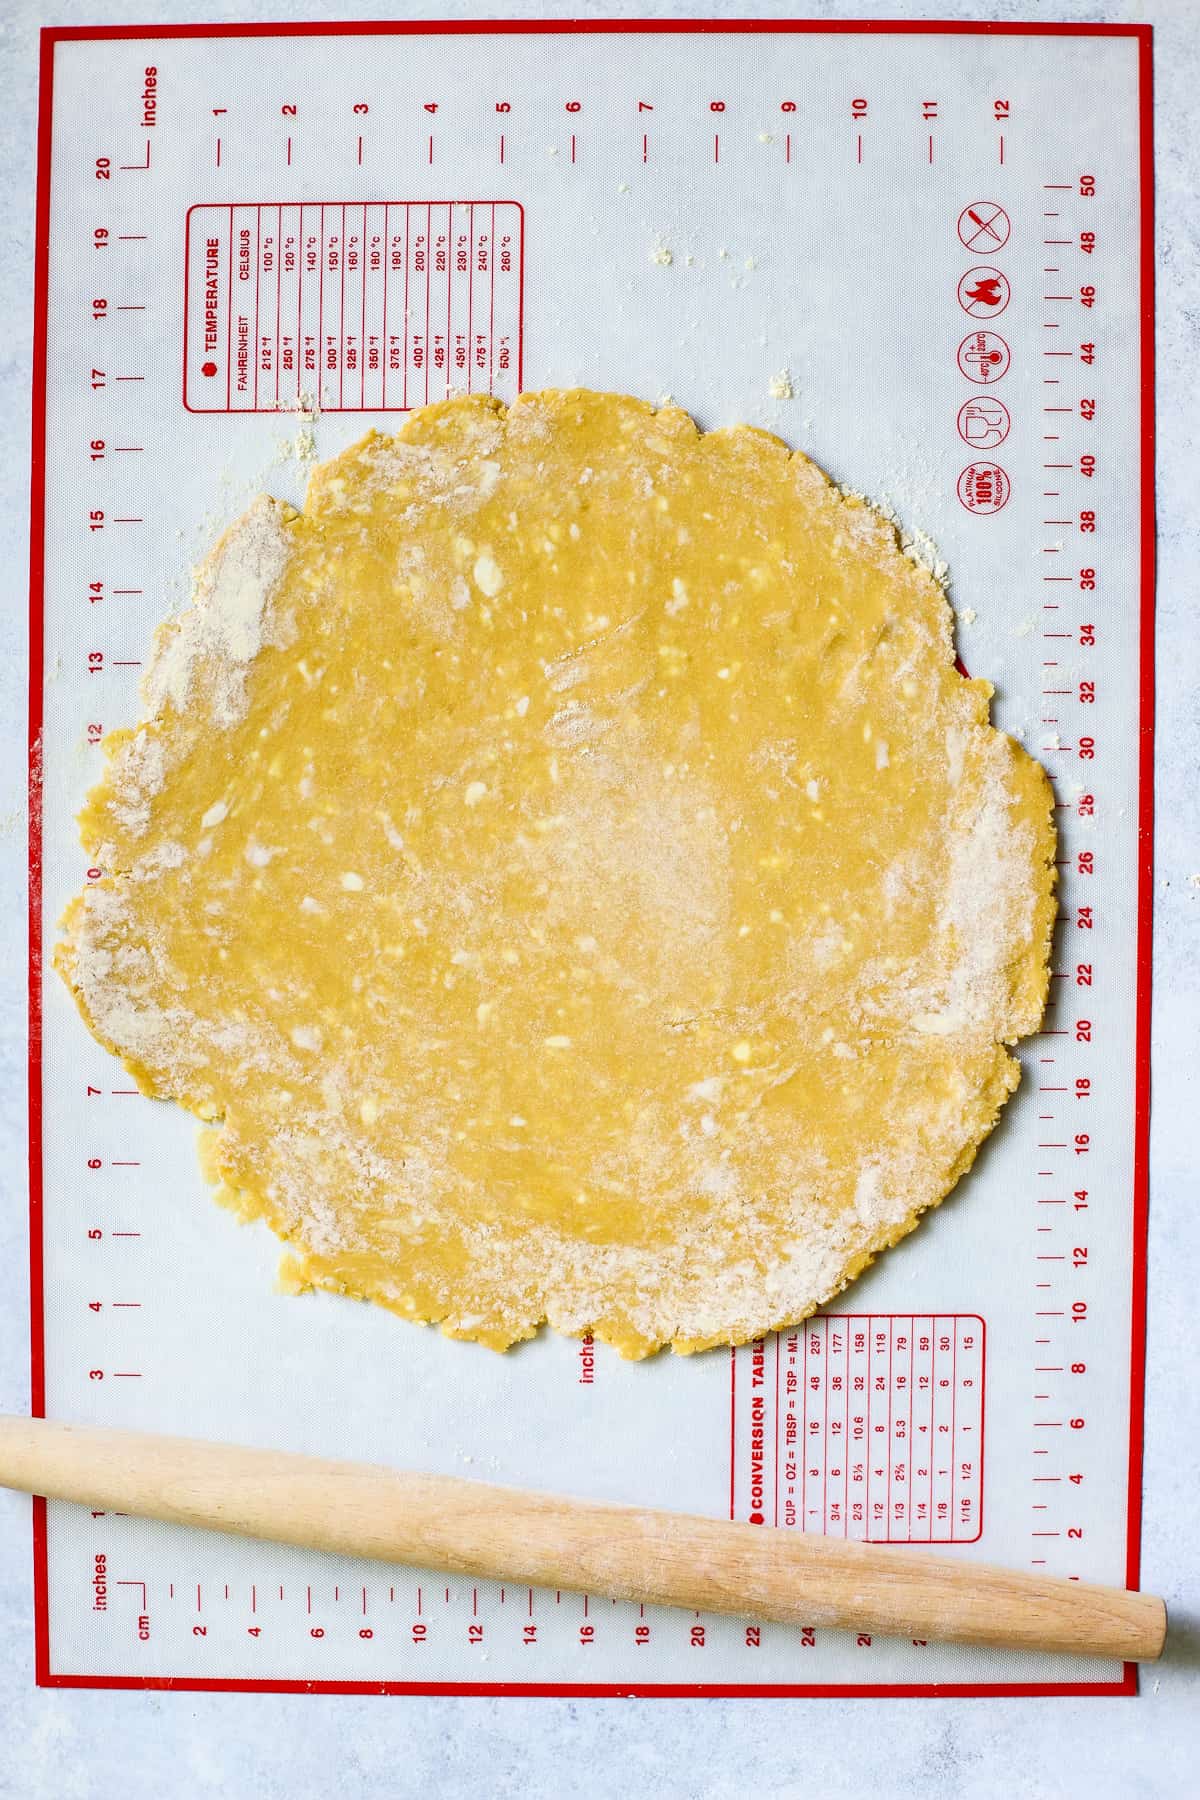
Step 8: Flour your work surface, hands, and rolling pin. Unwrap the dough and place it on the floured work surface, then roll it out until its 12 inches in diameter.
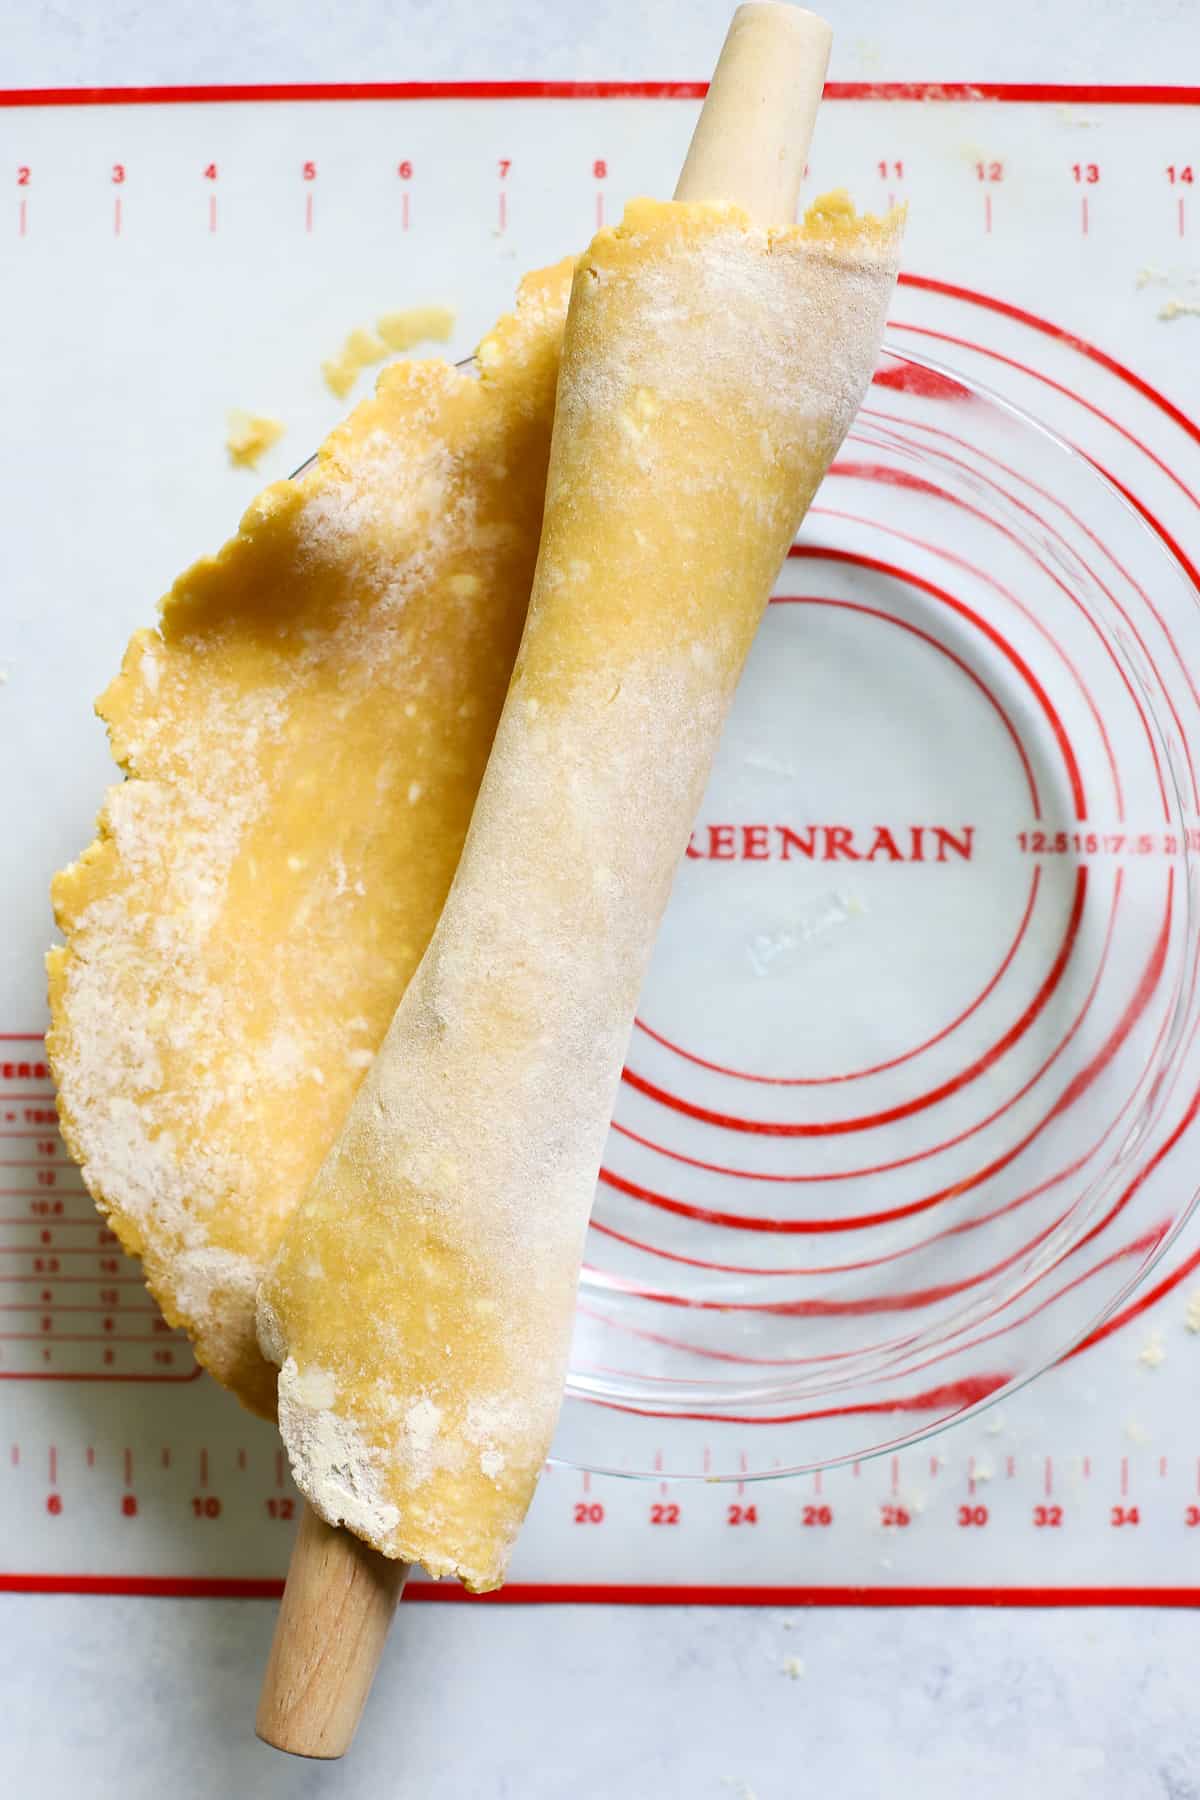
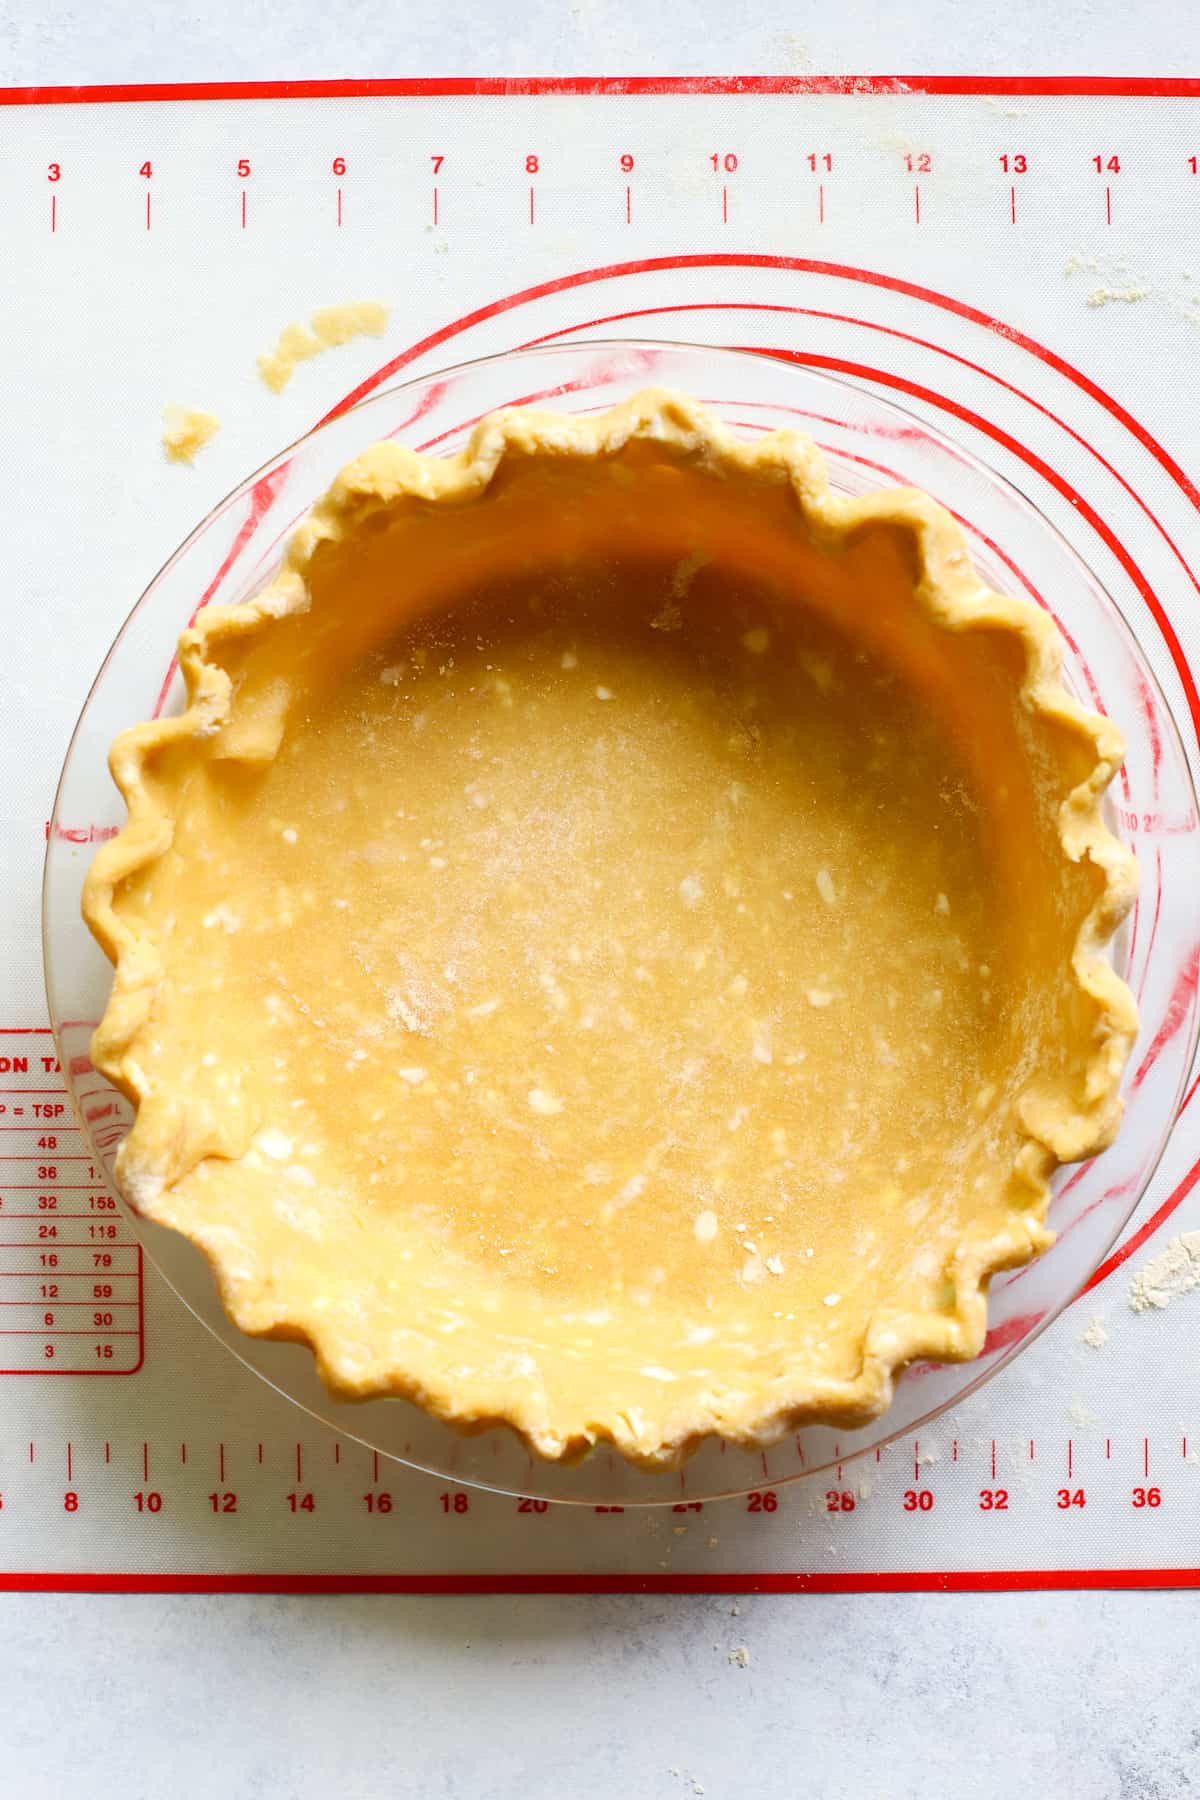
Step 9: Carefully and loosely roll the pie dough onto your rolling pin to transfer it to your pie dish.
Step 10: Fold in any excess dough hanging off the pie dish edge, and crimp the edges. Bake as instructed by your recipe!
No food processor? No problem! Use a pastry cutter or two forks to cut the cold butter into the flour mixture until a crumbly dough (like the below) forms. Then, as you add ice water in the next steps, simply stir it in since you won't be use a food processor to pulse the mixture.
Hint: If your kitchen is warm, or the pie dough just got warm as you were working, chill the ingredients at any time throughout. That means you can chill the entire bowl of flour, butter, or even the food processor itself! This will result in a flaky pie crust and a dough that's easy to work with.

Storage
To store this chickpea flour pastry, leave it in its disc shape tightly wrapped in plastic wrap and stored in the fridge, until you're ready to use it.
You can also freeze the dough to use at a later date. Place the plastic-wrapped dough disc in reusable freezer-safe bag or airtight container for up to three months. Once you're ready to use it, leave it in the fridge overnight until thawed, then use according to the instructions set forth here.
Chickpea Flour Pie Crust FAQs
In my opinion, the flavor is more savory and best lends itself to quiches, savory tarts, pot pies, and other savory dishes. That said, please feel free to try it!
You can use chickpea flour pie crust in any savory recipe requiring pie crust! I highly recommend using it in quiche. This simple quiche with chickpea flour pie crust is one of our go-to recipes!
There's no difference! These are two words for the same thing.
Did you make this recipe? Don't forget to leave a star rating 🌟 and comment below and tag me on Instagram and Pinterest so I can see what you made!
Print📖 Recipe

All Butter Chickpea Flour Pie Crust (Gram Flour Pastry)
- Total Time: 2 hours 15 minutes
- Yield: 1 pie crust 1x
Description
An all butter chickpea flour pie crust that's gluten-free, super tasty, flaky, buttery, and made with whole foods! A pie crust you can feel good about? Sign me up! This chickpea flour pastry is perfect for any savory dish requiring pie dough or crust.
Ingredients
- 1 ½ cups chickpea flour (I like the kind by Bob's Red Mill)
- ½ teaspoon salt
- ½ tablespoon organic cane sugar (optional)
- 1 stick butter, cut into cubes and frozen
- ½ cup water, with ice cubes (you won't need all of it, but better to be prepared!)
Instructions
- Make the flour mixture. Place chickpea flour, salt, and natural cane sugar in a bowl and whisk to combine.
- Cut butter into chickpea flour. Add cold butter cubes to the food processor and pulse until a crumbly dough forms (the crumbly bits should be about pea-sized or a little bigger).
- Add iced water. Using a tablespoon measure, add the iced water (but not the ice) to the flour-butter mixture. Start with three tablespoons, pulse for a few seconds, and then add one tablespoon at a time, pulsing for several seconds in between each addition until the dough comes together in a ball. It usually takes me 6-8 tablespoons.
- Form the dough disc. Turn the clump of pie dough out onto a floured surface and shape it into one round disc. Wrap it tightly in plastic wrap and chill in the fridge for at least two hours and up to a couple days.
- Roll out the dough. Unwrap the pie dough and discard the plastic wrap. Set the dough disc on a floured work surface and sprinkle more flour into your rolling pins and hands. Begin rolling out the dough with a rolling pin, turning it over occasionally to keep from sticking. Add more flour to the work surface or dough as necessary. Roll it out until it's about ¼-inch thick (at least 12 inches in diameter).
- Transfer dough to pie dish. Carefully roll the pie dough onto your rolling pin so that it's loosely wrapped around it. Unroll the dough into a 9-inch pie dish and let it sink into the dish, helping guide it to fit. Roll in the jagged edges and flute the edges using your index fingers and thumb (see photos in post).
- Bake. Bake the pie crust according to your recipe's instructions.
Notes
- Prep time: The prep time includes 2 hours of dough chilling in fridge. The total cook time will vary depending on the recipe you use for your pie crust.
- Baking the dough: This instructions provided are intended for quiches or savory pies and tarts. If you're not using this pastry for a pie or quiche, you can roll it out or shape it according to your recipe's instructions before baking.
- Prep Time: 2 hours 15 minutes
- Category: Baked Goods
- Method: Food processor
- Cuisine: American
Nutrition
- Serving Size: ⅛ crust
- Calories: 171
- Sugar: 2.7 g
- Sodium: 158.5 mg
- Fat: 12.6 g
- Saturated Fat: 7.3 g
- Trans Fat: 0 g
- Carbohydrates: 10.8 g
- Fiber: 1.9 g
- Protein: 4 g
- Cholesterol: 30.4 mg
This post contains affiliate links for products I truly recommend. Thanks for your support!


Michael says
This is a wonderful recipe. It is as easy as a flour-based recipe but with better health benefits. I was making a red onion tart, which, for some recipes, requires blind baking. It is not necessary to blind-bake using this recipe. I made this the old-fashioned way, using a dough cutter, a spatula, 8 tablespoons of ice water, and elbow grease. I did not roll out the dough; I placed it in the middle of the tart tin and hand-rolled it.
A+
Tera Gigot says
Wow!! Your tart sounds SO delicious! Thank you for sharing your experience and I'm so happy you were able to try & enjoy. Cheers!
Eli Hewison says
How much is 1 stick butter? Good to know I can use chickpea flour for a pie as I have a friend who is gluten free.
Tera Gigot says
Hello! 1 stick of butter is 113 grams. It can also be measured as 8 tablespoons or 1/2 cup, but grams is going to get you the most exact amount. Yes we have a few gluten free friends too and it's so nice to have options!! Enjoy and let me know any other questions 🙂 Cheers!
Tina Taylor says
Made this pastry loved it, at last pastry that is gluten free and taste great. Can you freeze this at the dough stage, before rolling out, for a later time.
Tera says
Hi Tina, I'm so glad you liked it! You can absolutely freeze this dough. Once you prepare the dough and shape it into a disc to chill, simply wrap it tightly in plastic wrap (I've also had success with bees wrap for a greener option), place it in a zip-top bag or airtight container, then place it in your freezer. When you're ready to use it, thaw it overnight in your fridge and then roll it out as usual the next day. It can stay in the freezer for up to 3 months.
Anne Cutugno says
Tried you pastry today… lovely! Very tasty & crisp. Thank you 😊
Tera says
So glad to hear it, Anne! 🙂 You are very welcome!
Nithya says
Is this recipe for 2 sticks butter or 1 stick butter?
Tera says
Hi! It's for 1 stick of butter (113g or 8 tbsp).
Bart says
I. Love. This. Pie crust. Thank you!
caren says
I was thinking of making a spinach pie. assuming I would cook the shell before adding the filling, how long what temp ?
thanks
Tera says
Hi Caren, yes! Great question. You'll want to pre-bake (also known as "blind bake") the crust for a spinach pie if it has a wet filling (such as raw eggs, cream or milk, etc.). Just preheat the oven to 400 and bake it for 7-8 minutes until the bottom of the crust is just beginning to brown. This will solidify it enough so that your filling doesn't make it soggy. One tip: sometimes a blind-baked pie crust can puff up a bit -- to prevent this, you can use pie weights or dried beans. Just set them directly onto the crust to weigh it down while baking. Hope that helps!
Geraldine Maberley says
What weight is 2 sticks of butter please, also what is 2 1/4 cups.
Tera says
Hi Geraldine, two sticks of butter is 226 grams, and 2 1/4 cups of chickpea flour is 207 grams.
john harding says
Since the whole world outside America measures ingredients by weight in grams or volume in ml, I look forward to a future in which this information will be supplied by default.
Melissa says
Looks amazing! How does one adapt it for a fruit pie, so it’s a tiny bit sweet?
Tera says
Thank you! Adding 1 tbsp of sugar in the first step should do the trick 🙂 I haven't tried a chickpea flour pie crust in fruit pie yet, so I'd love to hear about the results if you try it!
Fletcher says
I tried the above approach with a blackberry pie. The results were acceptable although I'd say sticking with a more neutral tasting gluten-free flour for fruit pies is preferred.
Tera says
I prefer chickpea flour with savory flavors as well! Thank you so much for sharing your experience here.
James Kareka says
Made this today for a fresh tomato and goat cheese tart I was making. It was PERFECT. You would never know it was chickpea flour unless someone told you. It was just a super delicious, buttery, flaky crust. Easy to work with and held together perfectly. I have printed this recipe and adding it to my list of go-to's for the future. Thank you!
Tera says
YES! I'm so glad you like it, James! Also, your tart sounds incredible 🙂